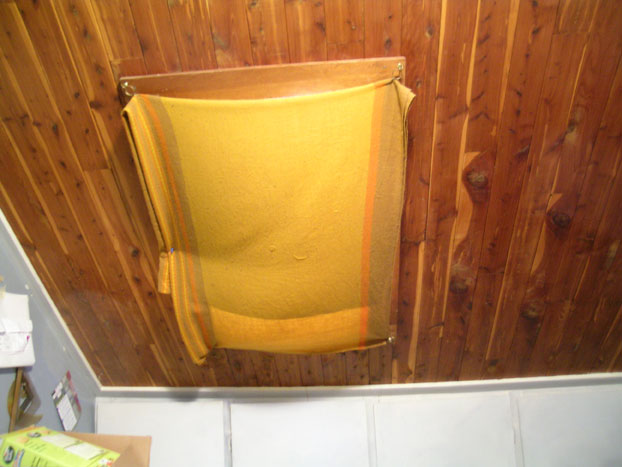
For those who enjoy this sort of thing, here is some of it. The bowl of the birdbath someone left out on the curb a few years ago started breaking up last year, so I molded a new one by making a hole in the soft soil of one of the planting beds and casting it in place. It needed a depression in the bottom, 1 inch deep and 5 inches diameter, so I faked up a thing at the bottom of the hole and miraculously it all worked out. I dug it out and hosed it down and it looked pretty good. It fits over the top of the pedestal fine and it holds water. I used one bag of mortar mix. Here is a tip I already knew so I didn't have to learn it by accident - don't dump the whole bag into the mixing tub. Save some in case you get it a little too wet, and you can balance it out. Here is the hand-molded rustic birdbath: [Addendum - I removed the inner tray, remnant of the old leaking bowl. The wire frame is primarily to keep the crows off, but the little birds like to perch on it and scope things out before they go in.]
I didn't dig out the compost heap last year, so this is the year for it. Below is the sifting screen I built for Frankenstein the Cart, all salvaged materials except half a dozen screws:
I dump the compost in, lift the handles on the near end in an underhand grip, and shake. The well-digested compost from the bottom of the heap goes right through and whatever is left in the screen will go back in the heap for another year or two. I moved the upper half of the heap onto a tarp in the yard because it is mostly undigested, and it will go back into the enclosure today. Here is what ten minutes of shaking the sifter provides:
I filled a big plastic trash barrel, and dumped a couple of big mounds onto planting beds to be distributed and worked into the soil when it is a little less muddy. It took me two shifts to sift it all - the first day I moved the top of the heap and sifted half of it, and was pretty wiped out from the heavy upper body exercise and unaccustomed sun exposure. I took a day off and did the rest of the sifting in about an hour, then took a long bike ride that afternoon to balance out the exercise. Today I move the heap back into the enclosure and go work out at the health club this afternoon. I am like some kind of vegetarian organic gardening health nut computer geek cartoon.
Showing posts with label home improvement. Show all posts
Monday, March 11, 2013
Friday, May 4, 2012
FRANKENSTEIN THE CART PAYS FOR ITSELF
I recently noticed that some folks about 7 blocks from here had taken down a section of fence so last evening I offered to take it away. This morning I took the end board off of Frankenstein the Cart and trundled it over there. IMPORTANT DESIGN NOTE: Handles - the longer the better. These are too short. You need to be able to push the empty cart with your arms hanging straight down, with enough room for your legs to swing. This is about 45 6-foot cedar fence boards, a bit rotted at one end, six 8-foot treated 2x4 stringers, and two 4x4 posts which rotted off at about 6 feet. It was actually easier to handle while loaded as it balanced on the wheels and all I had to do was shove and keep it balanced, but I had to rest at the end of every block. I hope this is the heaviest load I will ever have to haul with this cart.
The fence boards don't have to hold themselves up, because they will be between the existing fence and the hedge, so my plan at this point is to rig the 2x4 stringers up on the chain link fence with heavy duty zip ties just to hold them in place, and attach the fence boards with screws. As long as it provides a visual barrier its job is done.
Tuesday, May 1, 2012
NEW GARDEN CART
Here is the new garden cart, given a name which is a common term of affection in our household. I used a couple of pieces of new wood left over from the porch re-build last year, but the rest is salvaged scrap. The box is 4 feet long, two feet high, and 18 inches wide. I will watch for a couple more boards to bring the inner walls up level with the top of the box but for now it is okay. I oiled the wheels and they spun very smoothly for a long time. Those are good wheels. It tips up pretty easy and won't take up too much space in a corner. Time will tell how useful it will be but at least the old parts are being put to some use, and not being taken to the neighborhood cleanup this Saturday.
Thursday, April 26, 2012
OLD GARDEN CART
Goodbye to the old garden cart. I got this for five dollars when I was just starting to work in the garden. It had been patched, repaired and rebuilt. It was extremely heavy, and when fully loaded with compost it was topheavy too. The old plywood addition finally started rotting away and it had been a couple of years since I had used it. Then I saw a simple cart design that inspired me to finally tear it apart. I had to break a couple of bolts with a cold chisel, and saw through a couple of things, but mostly it was pretty easy. I'm going to see what I can put together using only the lumber I have on hand, mostly scrap and leftovers, re-using the old wheels to make a long narrow cart with solid bottom and sides that I can shovel stuff into and tip it out of.
So that is what I did this morning, took apart the old cart. And made cookies. Not very good ones though, kind of bland, dry and cakey from a 1940s recipe.
Tuesday, August 23, 2011
SKYLIGHT REMOVAL - The End
Too tired to do anything but post this picture of the finished roof. I need to go up again tomorrow morning and put in the replacement for the support block, which Barron kindly cut for me to match the original, and to clean out the gutter. I decided to buy a couple of tubes of roofing cement and use a caulking gun to squirt a line of black goo along under the lower edge of each tab so if we do get a good wind there will be less likelihood of it getting under and ripping them off. I also found that bare feet are much better than shoes for roofing, but next time I may try a pair of cheap "water socks," flexible shoe thingies with a grippy rubber sole.
As for the investigative aspect of the project, I found that the cost came out to about the same as using pre-cut shingles would be. I spent about $30 more total for roll roofing than I would for shingles, but have half a roll left. This house will have to be re-roofed before I die unless I die in the next year or so, in which case it is not my problem. If I do it within two years the shingles will still be in good enough shape I can just put the new ones over them. If I wait much more than that, they will get warped and curly enough that they will have to be stripped off and replaced, which would just about triple the work involved. It takes about an hour and a half to cut a whole roll of roofing into these two tab hex shingles, which covers about 50 - 60 square feet. I will see how this holds up over the winter and if it doesn't suffer any major failure I will probably use this technique in the future. About half of the roof is not visible from the street so I would use uncut roll roofing, but for the visible areas I would like to do something interesting and I think a two or three color treatment of this would be pretty cool.
Saturday, August 20, 2011
SKYLIGHT REMOVAL PART THREE - interlude
Here is my secret - everything I know about roofing comes from this article in volume 4 of the Popular Mechanics Illustrated Home Handyman Encyclopedia & Guide. Since I had to re-shingle part of the roof I wanted to take this opportunity to experiment with an old shingle design from this book. It is the second one down in the diagram on the right, the 2-tab hex shingle. I mulled it over in my mind a lot for the past week or so to come up with the best way of laying out and cutting the shingles.
Here are some tools I thought I might need today. I used the meter stick, iron square, chalk, triangle and linoleum cutter to lay out the pattern for my master shingle and used it as the template to cut the rest. I was having so much fun I forgot to take a picture of my setup for cutting the roll roofing into shingles. I got to work under the tree in the back yard a few feet away from the bird bath and feeders, and enjoyed the company of a pair of nuthatches for a few minutes as I worked. I will take a photo when the time comes to start cutting the second roll.
Here's the concept. I don't know if this will ultimately end up being much cheaper than using standard shingles, though roll roofing only costs about half as much as pre-cut. I have to cover 130 square feet and three packs of shingles will cover 100 square feet, ideally, at $25+ per pack. I figure I would have to buy at least five packs. I bought two rolls of roofing at $49 each and will see how it goes. Standard shingles have a line of tar applied to the back that seals the lower edge down to keep them from blowing off, and I will probably apply some roofing tar under the lower corners. I found a gallon can of roofing tar in the shed when we moved in and have been using it ever since. What I would really like to do is use two or three colors, but I am just going to see how this goes. Imagine it in white, brown and green. That would be amazing.
This is what I cut the shingles with, a nice looking old linoleum cutter I found in the street one day while biking. I cut from the back side and the angle of the blade is just right for that purpose. By the time I got done cutting one roll it was almost noon and almost 80 degrees with the sun just starting to hit the west side of the roof. I start to wilt when it gets over 70 and I am sure not going on the roof at this point. I'd really like a couple of overcast days on Monday and Tuesday to get this done so I could work longer.
Here's all the stuff for the job - uniform size shingles and odds and ends will all be used. I got a new piece of flashing for that vent pipe - the silver thing with the black rubber circle. To the left is the roofing felt which you put down first to help keep things watertight. I have been using the shorter one for years since I got it to re-roof after removing the other skylight. The longer roll is another thing that was lying in the street one day. I strapped it on the back of my bike and brought it home. Tomorrow I want to go out early and get some blackberries, then Zombie Croquet at the Mystery Hole in the afternoon. Have a nice weekend!
SKYLIGHT REMOVAL PART TWO
Yesterday I pried the skylight off and lowered it inside. It was stuck down with a whole lot of transparent silicon adhesive and a whole lot of caulking that I had put on to try to keep it from leaking. The adhesive along the upper edge was entirely covered with roofing grit that had washed in over the years.
Better replace this doohickey while I am at it. The rubber seal is split and will let water in.

Better replace this doohickey while I am at it. The rubber seal is split and will let water in.

This is the edge of the hole as seen from inside. The outer layer is sheathing plywood on top of the old horizontal boards the original wooden shingles were nailed to. The thin innermost layer is a decorative application of thin cedar which must have been really expensive. Behind that is a surprise - the sloping ceiling is covered with horizontal tongue-in-groove boards, the original early 1900s building technique. The room below also has a couple of walls of this. The opposite side of the room had been re-done with sheetrock and I had assumed I would find that under the cedar. I would then fill in the hole with a scrap of sheetrock and paint it all. I will figure out something else now.
The patch ready to go, cut to fit. Thanks to Barron for this scrap and for cutting it to size for me. I pre-drilled and stuck screws in, and pulled it up from the outside, laid it in place and drove the screws in with my cordless drill. I was too tired to take a thrilling picture of the patched hole for you. I have about four good hours of work in me per day, plus another hour of not so good work, and the roof at 2 p.m. is not a good place for me to be, with half a headache and the sun beating down. Next comes re-roofing.


Thursday, August 18, 2011
SKYLIGHT REMOVAL PART ONE - a photographic essay
First an historical diagram. This house is so weirdly complex it is hard to grasp its structure, even for me, and I have been in every place a person can get into here. In red is the original structure. Yellow is the first expansion, raising the roof and building a new stairway on the east side. The little yellow section on the east side is where they raised the roof for the top of the stairs, and there was a time when it stuck out alone, before the blue section was added. The original stairs were at the back of the house, to the north. The various blue tones followed - I don't know what came when, and the porch may have been added when the roof was raised and the basement was expanded. I know the wing on the east side, which contains the upstairs bathroom, came after the stairs were added, because in the attic there is a weird little area where the yellow, blue and red zones meet, and I found exterior siding on the north side of the area which comprises the top of the stairs. The green square is what interests us today.

This is how it has been for years. When I uncovered it today the overcast light of morning was so nice I almost forgot why I have kept it covered and looked forward with eagerness to the day I would get rid of it. Then I remembered that a foot-wide beam of sunlight creeping across the workbench does not help at all, nor does having things get dripped on and mopping up under a hole in the roof all winter.
Moss on the outside, mold on the inside. I tried many times to seal it from inside and outside but never succeeded until I just stapled a sheet of plastic over it.
Tools for today's work - climbing harness and rope, belt bag for nails, and demolition bar. The rubber mallet was not needed.
Here it is. As you see, the plastic skylight is much larger than the opening, overlapping it on all four sides. It is glued on, and held down with strap iron that is nailed to the side of the box.
Here is how I remove the shingles. Safety apparatus in foreground. I thought I might salvage some shingles but they are too old to re-use, but I like to be orderly. Unlike professional roofers who have a crew of five and a drop box to throw everything in, I can't just scrape the shingles off with a shovel and dump them off the roof. I remove the nails and put them in my leather belt bag, and try to drop the shingles so they don't get all crunched up in a heap.
Maybe this was why it leaked. You are supposed to layer those pieces of metal flashing (that's what they call it, flashing) so they match the layers of shingles. It comes in a roll, 8 inches wide by 10 feet long. I know because one piece had the sticker on it. If I were doing it, I would cut them all the same size and add one with each layer of shingles, to ensure that water rolled off and down the roof, instead of seeping in and wrecking somebody's bookbinding supplies.
And what the hell is this sticking out? There is one on the other side too. The skylight is made of two sheets of plastic spaced about half an inch apart, with these sort of gas vent things similar to a tire inner tube filler. The knurled cap screws off and there is some mechanism inside. It looks like this was actually built as a window of some kind, to be filled with an inert gas, but it was probably picked up as salvage and used on our house. The skylight at the front of the house, which I replaced years ago, was also two layers but more obviously faked up than this. Note the sophisticated attachment technique with the strap iron. That will keep it on.
Another interesting feature at the top of the house where the newer structure meets the original wall. This cannot be blamed on the skylight builders. Here the flashing should be fitted to the siding, slid up under each piece of siding and fitted to the roof to prevent water getting into the crack. You really don't need that under an 18 inch overlap because it would take a hurricane to get water back there, so maybe that is why they just crapped it up with a bunch of pieces at random like that. You can see a spot of bare wood on the underside of that beam, indicating that there was once a support piece resting on the roof ridge below. I painted the green parts and you can see where I stopped, because you actually have to be right where I was when I took the picture to see it.
Here is another thing farther down. Only about half of this support block is left, and I will have to cut a new one. It was pretty loose and only nailed to the roof. Nothing will collapse without it but I don't want to walk on that overhang until it is replaced. You can also see this in the first exterior photo of the skylight, above.
Today's mission accomplished. Most of the shingles are stripped off except for the ones behind the skylight and under the overhang, which I can't get to until I remove the skylight.Friday, July 29, 2011
PORCH PROJECT - final report
Today I restored the third pillar. I also took off the new steps I added to the west end so I could build this frame for the access opening. Then I took the stairs apart and rebuilt them using metal brackets and, although they still came out a little wacky, I am much more satisfied with their structural integrity. Basically if you fall down those steps it is your fault, not the steps. I will keep an eye on them and see how they hold up. I can remove them by taking out four screws, so if I need to work on them again in the future it will not be much of a problem.

All that is left is a little detail work and a final once-over with paint. It won't look much different from this.

There is not a huge difference between the current state and the way it looked when this non-summer google picture was taken. Which was my plan all along. Make it the same only better.

At least I don't feel it weighing on me as much now that it is visually unified, and the plumbing situation has eased off from impending doom status so I feel I can just relax all day tomorrow and take a shot at it on Sunday. It's not the kind of thing that makes for good blogging so I will not be reporting on it, but I do have a poorly-built leaky amateur skylight in my studio I need to fill in before the rains start up again and roof stuff is pretty exciting so we have that to look forward to. I will keep you posted.
Tuesday, July 26, 2011
PORCH PROJECT - two pillars restored
Today I got two of the pillars put together. Since I am putting 7.5 inch square pillars around a 3.5 inch post I have to cobble together one inch spacers to go inside. Of course nothing is actually one inch - it's all 3/4 for some reason. Somebody knows why but I don't. I happened to have some 1/4 inch flat molding that I could put together with 3/4 inch wood to make an actual inch. Pretty crappy looking but all they have to do is be there.

Here is what they are doing. The pillar boards are nailed to each other and to the spacers placed at the top and bottom of the post. There is a lot of fiddly work and adjusting to do, and nothing is really square or straight, but I am holding my own, so to speak.

Two pillars built, in need of some touchup and paint, but from a distance they look okay. They are certainly not much worse than what was there before. I am working at the limit of my skill and the ability of my tools and as long as you don't look too closely it's alright.


Two pillars built, in need of some touchup and paint, but from a distance they look okay. They are certainly not much worse than what was there before. I am working at the limit of my skill and the ability of my tools and as long as you don't look too closely it's alright.

The bummer of the day was, just when I was about to start doing this, Donna told me there was water on the floor of the back room in the basement, near where she keeps some of her books for sale. I wisely had everything up off the floor on an old wooden futon frame for just such an event. It seems an ancient iron water pipe has sprung a slow pinhole leak, and it is very fortunately in a place that it will be relatively easy to replace it with copper. I keep hoping the 80+ year old parts of the plumbing will just wait until I am dead to fail because some of it will be a real pain to replace. So I got to start my work angry and frustrated at having been suddenly jolted out of my focus by another problem. It's been pretty rough the past few weeks with environmental issues - too hot, too sunny, too many people out doing things and raising a ruckus, and I have been generally anxious and depressed over that and my zillions of internal demons I never discuss with anyone. I really have no person or thing I can turn to for relief. Now I have to think of this new thing too.
Friday, July 22, 2011
PORCH PROJECT - cosmetic
It was rainy for a few days this week, which delayed my work since it involved a lot of painting. Over the past three working days I have completed most of the cosmetic restoration of the railing wall. I was able to salvage much of the original siding, and only had to buy one 16 foot piece, the top one across the inside of the wall as seen below. It was mostly just painting, sanding, cutting and nailing which is not as exciting as demolition and takes longer.
One of the many useful features the old porch lacked was the cutouts at the bottom. Since it was only open at one end, all the leaves and blossoms shed by the wisteria had to be swept the entire length of the porch. That's what those cutouts are for - if you look you will see them on a lot of porches, so you can sweep stuff out. Some of the details came out a bit weirdly where the end parts come together, but it achieves my basic need of not having anything jump out at you from ten feet away that makes you say what the hell is that.
This is the wood for the pillar restoration. The short ones below are salvaged from the original pillars and the longer ones are new wood I bought today. I hope I have made my last purchase of materials for this, but I may end up having to buy one or two little things I can't predict yet.
Addendum: I just did the math and not counting the trip to the dump and the gallon of paint I bought today this project comes out to almost exactly $700. That is way more than I had hoped, but about a tenth of what I would pay to have somebody else do it. I was hoping for more like $400, but it's something I won't have to do again so I am glad I did it as well as I could. I think the wood I salvaged saved me about $150 - $200.
Friday, July 15, 2011
PORCH PROJECT - my rival
Just to provide some perspective on this whole thing, when I am patching and painting thirty year old siding to re-use it, or coming home with two boards and a box of screws, these guys are dropping off huge truckloads of lumber and materials across the street.

The strange thing is that, while it will undoubtedly be the nicest house on the block, it bears an unsettling resemblance to the crappiest house on the block, two doors down. Both views taken from our upstairs front windows.
Thursday, July 14, 2011
PORCH PROJECT - siding, railing, and a stupid thing in a hole
The last couple of days have involved a lot of painting of wood in preparation for assembly into the finished porch railing. There was some drying time today which I spent cleaning up the garden and some small neglected areas. When we moved into the house there was a two foot high planter box occupying what is now the dirt strip in front of the porch, and when I tore it out there was one post that wouldn't come out so I cut it off around ground level. Today after a couple of decades I finally dug down deep enough to see what was going on. About two feet down I came to this concrete post hole filler. That is the sort of thing that is usually at ground level. There is no reason to dig three or four feet down, set your post in concrete, and then bury it under two feet of dirt. The only thing that makes any sense, and even that doesn't make any sense, is that they had this post they dug up from some other spot with the concrete on it, and then buried it that deep. Which is stupid. Nothing about this makes sense. I knew I wasn't going to get that out so I started whanging away at the post with U.S. GOVT, my loyal ball peen demolition hammer, until the concrete block cracked and I was able to pull the post out. The concrete is still down there, for the next guy to worry about.

This is what I got done over the last two days, replacing siding and putting the 9.5 inch wide upper railing on.


Friday, July 8, 2011
PORCH PROJECT - rail framing and scrap to the dump
Yesterday I got the framing for the porch rail done. It was just a lot of cutting things to length and screwing them together, with only a few errors to complicate things. Here's what it looks like. The good thing was, I had to return some bolts and brackets I overbought at the beginning of the work and the lumber I bought for the framing and railing came out to be less than what I got back on the return so I ended up with a net gain for the day. I am becoming less satisfied with those steps as they seem a bit wobblier than I like. I don't think the 2x2 supports under the steps are stable enough.

Today I loaded up what was left of the old porch and hauled it to the dump. All the unpainted wood went to people who will use it in some way, so there was just this carload of painted wood.
Here is the entrance to the transfer station. It is about a ten minute drive down the freeway from here. The truck ahead of me is on the scale, checking in at the window to find out where to take it. They weigh your vehicle on the way in and again on the way out and charge by weight with, I believe, a $20 dollar minimum. The white structure in the background is the big shed where I was to go.
The last of the old porch is on that big heap of scrap wood. There were a number of different heaps around the shed, with the constant rumble, crunching and beeping of a big machine scraping it up and moving it around. It smells like an elementary school lunchroom plus dust. It always reminds me of my old lunch box.
Subscribe to:
Posts (Atom)