Wednesday, August 31, 2011

Movies - Frances Langford again

 I had bookmarked Girl Rush (1944) a while ago because it stars the obscure comedy duo of  Wally Brown and Alan Carney, but when I realized it also features Frances Langford I decided I'd better download it and get it watched.  Well, it's pretty terrible, combining a mediocre Gay Nineties music hall story with a flat RKO western and the Brown-Carney duo seems to me to be justly forgotten.

 Langford's hair is again an enormous superstructure some five or six inches high, perched atop her head like a Venusian Brain Bat but with sausage curls added in the back for that Gay Nineties look. To be fair, most of the girls in the movie have the same sort of hairstyle but hers is far and away the most huge and imposing. The movie is mercifully short, and other than feeding my temporary Langfordmania its only really notable moment is during the scene we see below - Robert Mitchum in drag.


As I was sitting in the sauna at the health club today, pondering the mystery of Frances Langford's immense hairdo, I recalled this scene from Dixie Jamboree, where she takes the wheel of the riverboat in a cartoonishly enormous captain's hat.  It was then that I figured it all out.
  In the 1920s and 1930s, it was cute to be little.  There was nothing more charming than a chest-high jazz-baby gazing up at her big strong man and a sweet little gold-digger like Joan Blondell could wrap any man around her little finger just by acting helpless.  In the '40s small women were not hep.  It wasn't cute any more to be little except in a juvenile role or as comedy relief, probably because the war effort demanded more of women and they were, temporarily at least, taking on a more autonomous and self-determining role in society.  Frances Langford was five feet one inch tall. Like the even more diminutive Carmen Miranda she was tricked out in high heels and big hats, and her colossal coiffure, to make her more acceptably large.  It really is a terribly unflattering style for her, and I find her much more human looking (and her vocal style more interesting) in this clip from the 1930s.

Somethinging Someone (or something)

At the end of the 20th century a movie titling trend emerged which I call somethinging someone. It's a verb in, correct me if I am wrong, the present active tense, followed by a noun - usually the name of a person. Before the late 20th century, somethinging someone titles rarely appear. Now they pop up a couple of times a year. I can see their appeal - they indicate the nature of the story by saying what happens and who or what it happens to, indicating an activity or pursuit of a goal. There is a lot of saving, being and becoming. A few of them are puns based on common phrases, or may simply be a phrase or term with the same structure. Sometimes the second word, up for instance, is not a noun. So what. I do not differentiate. I write them down when I see them and have accumulated this list.

Waltzing Matilda - 33
Eating Raoul - 82
Educating Rita - 83
Stalking Laura - 93
Boxing Helena - 93
Guarding Tess - 94
Deconstructing Sarah - 94
Stealing Beauty - 96
Chasing Amy - 97
Deconstructing Harry - 97
Finding Forrester - 00
Hanging Up - 00
Saving Grace - 00
Saving Silverman - 01
Kissing Jessica Stein - 01
Avenging Angelo - 02
Missing Allen - 02
Owning Mahowney - 03
Saving Face - 04
Being Julia - 04
Finding Neverland - 04
Following Sean - 05
Keeping Mum - 05
Nearing Grace - 05
Fetching Cody - 05
Copying Beethoven - 06
Finding Dawn - 06
Becoming Jane - 07
Closing Escrow - 07
Touching Home - 08
Finding Amanda - 08
Hatching Pete - 09
Passing Strange - 09
Taking Woodstock - 09
Loving Leah - 09
Erasing David - 10
Becoming Chaz - 11
Killing Bono - 11

BONUS! Somethinging someone with two names, a title, or in one case, an article.

Driving Miss Daisy - 89
Saving Private Ryan - 98
Waking Ned Devine - 98
Teaching Mrs. Tingle - 99
Being John Malkovich - 99
Raising Victor Vargas - 02
Seducing Dr. Lewis - 03
Capturing The Friedmans - 03
Hating Alison Ashley - 05
Forgiving Dr. Mengele - 06
Forgetting Sarah Marshall - 08


Movies - or more properly Hair

Dixie Jamboree (1942) is a bit substandard even for poverty row's Producer's Releasing Corporation (PRC), a Mississippi showboat story with Guy Kibbee as the captain, Lyle Talbot the heavy, and lightweight Eddie Quillen as the closest thing to a romantic lead they could come up with. The real interest in this for me is Frances Langford, or more exactly, the thing on her head. This review is not so much of this half-assed movie, but of a hair style.

That's Eddie Quillen, warily eyeing the immobile hair sculpture, or at least the tiny face buried within it. I recently reviewed the Eleanor Powell/Jimmy Stewart film Born to Dance in which Langford does not stand out at all because her head is not crowned by a gigantic immobile hair sculpture like this. She had a pretty good voice, and seems to have done well opposite Don Ameche in the Bickersons radio program, but as a screen actress she leaves much to be desired. Such as personality. Her lack of personality is more obvious when she is ostensibly the star of the film, and when she has a gigantic immobile hair structure perched upon her head, making her small round face seem even tinier and less appealing.

Here she is in Career Girl, another PRC cheapie made around the same time (greatly enhanced by the participation of Iris Adrian - really the only reason to watch it), with her hair sculpture even more gigantic and frightening. 1944 was not a good time for hair, or design in general. There was a trend in set design for musical films to create huge empty apartments or night-clubs dominated by one large baroque motif, isolated and enlarged like a piece chipped off an old picture frame and expanded a thousand times, and this sort of paralyzed upswept head encrustation appears to spring from the same puzzling source. Betty Grable's lack of appeal for me I attribute to her participation in this unappealing trend which makes a round face rounder and a blank face blanker. Her 1945 film The Dolly Sisters is a relentless assault of these frozen squiggly head sculptures, each one more freakish and unnatural than the last. They have the same visual impact on me as a baroque settee with tufted satin upholstery - too much detail creating a kind of nausea, see-sickness as it were. I am still forming theories on the sociocultural basis of this late-wartime design trend but at present it baffles and sickens me.

Tuesday, August 23, 2011

SKYLIGHT REMOVAL - The End

Too tired to do anything but post this picture of the finished roof. I need to go up again tomorrow morning and put in the replacement for the support block, which Barron kindly cut for me to match the original, and to clean out the gutter. I decided to buy a couple of tubes of roofing cement and use a caulking gun to squirt a line of black goo along under the lower edge of each tab so if we do get a good wind there will be less likelihood of it getting under and ripping them off. I also found that bare feet are much better than shoes for roofing, but next time I may try a pair of cheap "water socks," flexible shoe thingies with a grippy rubber sole.
As for the investigative aspect of the project, I found that the cost came out to about the same as using pre-cut shingles would be. I spent about $30 more total for roll roofing than I would for shingles, but have half a roll left. This house will have to be re-roofed before I die unless I die in the next year or so, in which case it is not my problem. If I do it within two years the shingles will still be in good enough shape I can just put the new ones over them. If I wait much more than that, they will get warped and curly enough that they will have to be stripped off and replaced, which would just about triple the work involved. It takes about an hour and a half to cut a whole roll of roofing into these two tab hex shingles, which covers about 50 - 60 square feet. I will see how this holds up over the winter and if it doesn't suffer any major failure I will probably use this technique in the future. About half of the roof is not visible from the street so I would use uncut roll roofing, but for the visible areas I would like to do something interesting and I think a two or three color treatment of this would be pretty cool.

Saturday, August 20, 2011

SKYLIGHT REMOVAL PART THREE - interlude

Here is my secret - everything I know about roofing comes from this article in volume 4 of the Popular Mechanics Illustrated Home Handyman Encyclopedia & Guide. Since I had to re-shingle part of the roof I wanted to take this opportunity to experiment with an old shingle design from this book. It is the second one down in the diagram on the right, the 2-tab hex shingle. I mulled it over in my mind a lot for the past week or so to come up with the best way of laying out and cutting the shingles.

Here are some tools I thought I might need today. I used the meter stick, iron square, chalk, triangle and linoleum cutter to lay out the pattern for my master shingle and used it as the template to cut the rest. I was having so much fun I forgot to take a picture of my setup for cutting the roll roofing into shingles. I got to work under the tree in the back yard a few feet away from the bird bath and feeders, and enjoyed the company of a pair of nuthatches for a few minutes as I worked. I will take a photo when the time comes to start cutting the second roll.

Here's the concept. I don't know if this will ultimately end up being much cheaper than using standard shingles, though roll roofing only costs about half as much as pre-cut. I have to cover 130 square feet and three packs of shingles will cover 100 square feet, ideally, at $25+ per pack. I figure I would have to buy at least five packs. I bought two rolls of roofing at $49 each and will see how it goes. Standard shingles have a line of tar applied to the back that seals the lower edge down to keep them from blowing off, and I will probably apply some roofing tar under the lower corners. I found a gallon can of roofing tar in the shed when we moved in and have been using it ever since. What I would really like to do is use two or three colors, but I am just going to see how this goes. Imagine it in white, brown and green. That would be amazing.

This is what I cut the shingles with, a nice looking old linoleum cutter I found in the street one day while biking. I cut from the back side and the angle of the blade is just right for that purpose. By the time I got done cutting one roll it was almost noon and almost 80 degrees with the sun just starting to hit the west side of the roof. I start to wilt when it gets over 70 and I am sure not going on the roof at this point. I'd really like a couple of overcast days on Monday and Tuesday to get this done so I could work longer.

Here's all the stuff for the job - uniform size shingles and odds and ends will all be used. I got a new piece of flashing for that vent pipe - the silver thing with the black rubber circle. To the left is the roofing felt which you put down first to help keep things watertight. I have been using the shorter one for years since I got it to re-roof after removing the other skylight. The longer roll is another thing that was lying in the street one day. I strapped it on the back of my bike and brought it home. Tomorrow I want to go out early and get some blackberries, then Zombie Croquet at the Mystery Hole in the afternoon. Have a nice weekend!

SKYLIGHT REMOVAL PART TWO

Yesterday I pried the skylight off and lowered it inside. It was stuck down with a whole lot of transparent silicon adhesive and a whole lot of caulking that I had put on to try to keep it from leaking. The adhesive along the upper edge was entirely covered with roofing grit that had washed in over the years.

Better replace this doohickey while I am at it. The rubber seal is split and will let water in.
This is the edge of the hole as seen from inside. The outer layer is sheathing plywood on top of the old horizontal boards the original wooden shingles were nailed to. The thin innermost layer is a decorative application of thin cedar which must have been really expensive. Behind that is a surprise - the sloping ceiling is covered with horizontal tongue-in-groove boards, the original early 1900s building technique. The room below also has a couple of walls of this. The opposite side of the room had been re-done with sheetrock and I had assumed I would find that under the cedar. I would then fill in the hole with a scrap of sheetrock and paint it all. I will figure out something else now.

Open to the world. The cedar is attractive, but a white ceiling would be a lot better.

Seen from outside - I have put 2x2 around the edge to screw the patch onto.

The patch ready to go, cut to fit. Thanks to Barron for this scrap and for cutting it to size for me. I pre-drilled and stuck screws in, and pulled it up from the outside, laid it in place and drove the screws in with my cordless drill. I was too tired to take a thrilling picture of the patched hole for you. I have about four good hours of work in me per day, plus another hour of not so good work, and the roof at 2 p.m. is not a good place for me to be, with half a headache and the sun beating down. Next comes re-roofing.

Thursday, August 18, 2011

SKYLIGHT REMOVAL PART ONE - a photographic essay

First an historical diagram. This house is so weirdly complex it is hard to grasp its structure, even for me, and I have been in every place a person can get into here. In red is the original structure. Yellow is the first expansion, raising the roof and building a new stairway on the east side. The little yellow section on the east side is where they raised the roof for the top of the stairs, and there was a time when it stuck out alone, before the blue section was added. The original stairs were at the back of the house, to the north. The various blue tones followed - I don't know what came when, and the porch may have been added when the roof was raised and the basement was expanded. I know the wing on the east side, which contains the upstairs bathroom, came after the stairs were added, because in the attic there is a weird little area where the yellow, blue and red zones meet, and I found exterior siding on the north side of the area which comprises the top of the stairs. The green square is what interests us today.

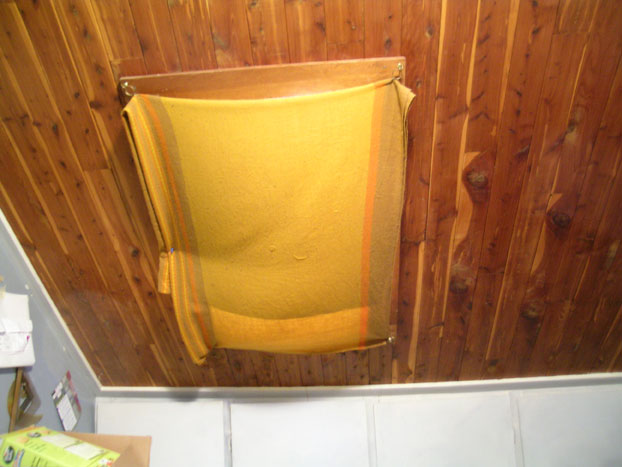
This is how it has been for years. When I uncovered it today the overcast light of morning was so nice I almost forgot why I have kept it covered and looked forward with eagerness to the day I would get rid of it. Then I remembered that a foot-wide beam of sunlight creeping across the workbench does not help at all, nor does having things get dripped on and mopping up under a hole in the roof all winter.
Moss on the outside, mold on the inside. I tried many times to seal it from inside and outside but never succeeded until I just stapled a sheet of plastic over it.
Tools for today's work - climbing harness and rope, belt bag for nails, and demolition bar. The rubber mallet was not needed.
Here it is. As you see, the plastic skylight is much larger than the opening, overlapping it on all four sides. It is glued on, and held down with strap iron that is nailed to the side of the box.
Here is how I remove the shingles. Safety apparatus in foreground. I thought I might salvage some shingles but they are too old to re-use, but I like to be orderly. Unlike professional roofers who have a crew of five and a drop box to throw everything in, I can't just scrape the shingles off with a shovel and dump them off the roof. I remove the nails and put them in my leather belt bag, and try to drop the shingles so they don't get all crunched up in a heap.
Maybe this was why it leaked. You are supposed to layer those pieces of metal flashing (that's what they call it, flashing) so they match the layers of shingles. It comes in a roll, 8 inches wide by 10 feet long. I know because one piece had the sticker on it. If I were doing it, I would cut them all the same size and add one with each layer of shingles, to ensure that water rolled off and down the roof, instead of seeping in and wrecking somebody's bookbinding supplies.
And what the hell is this sticking out? There is one on the other side too. The skylight is made of two sheets of plastic spaced about half an inch apart, with these sort of gas vent things similar to a tire inner tube filler. The knurled cap screws off and there is some mechanism inside. It looks like this was actually built as a window of some kind, to be filled with an inert gas, but it was probably picked up as salvage and used on our house. The skylight at the front of the house, which I replaced years ago, was also two layers but more obviously faked up than this. Note the sophisticated attachment technique with the strap iron. That will keep it on.
Another interesting feature at the top of the house where the newer structure meets the original wall. This cannot be blamed on the skylight builders. Here the flashing should be fitted to the siding, slid up under each piece of siding and fitted to the roof to prevent water getting into the crack. You really don't need that under an 18 inch overlap because it would take a hurricane to get water back there, so maybe that is why they just crapped it up with a bunch of pieces at random like that. You can see a spot of bare wood on the underside of that beam, indicating that there was once a support piece resting on the roof ridge below. I painted the green parts and you can see where I stopped, because you actually have to be right where I was when I took the picture to see it.
Here is another thing farther down. Only about half of this support block is left, and I will have to cut a new one. It was pretty loose and only nailed to the roof. Nothing will collapse without it but I don't want to walk on that overhang until it is replaced. You can also see this in the first exterior photo of the skylight, above.
Today's mission accomplished. Most of the shingles are stripped off except for the ones behind the skylight and under the overhang, which I can't get to until I remove the skylight.
Here are the shingles stacked up. I will have to figure out how to dispose of them. Next step - demolition of the skylight.