Showing posts with label porch project. Show all posts

Friday, July 29, 2011

PORCH PROJECT - final report


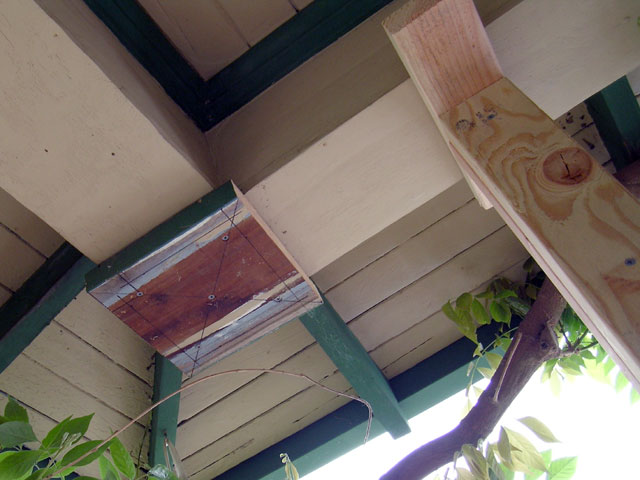
Today I restored the third pillar. I also took off the new steps I added to the west end so I could build this frame for the access opening. Then I took the stairs apart and rebuilt them using metal brackets and, although they still came out a little wacky, I am much more satisfied with their structural integrity. Basically if you fall down those steps it is your fault, not the steps. I will keep an eye on them and see how they hold up. I can remove them by taking out four screws, so if I need to work on them again in the future it will not be much of a problem.

All that is left is a little detail work and a final once-over with paint. It won't look much different from this.

There is not a huge difference between the current state and the way it looked when this non-summer google picture was taken. Which was my plan all along. Make it the same only better.

At least I don't feel it weighing on me as much now that it is visually unified, and the plumbing situation has eased off from impending doom status so I feel I can just relax all day tomorrow and take a shot at it on Sunday. It's not the kind of thing that makes for good blogging so I will not be reporting on it, but I do have a poorly-built leaky amateur skylight in my studio I need to fill in before the rains start up again and roof stuff is pretty exciting so we have that to look forward to. I will keep you posted.

Tuesday, July 26, 2011

PORCH PROJECT - two pillars restored

Today I got two of the pillars put together. Since I am putting 7.5 inch square pillars around a 3.5 inch post I have to cobble together one inch spacers to go inside. Of course nothing is actually one inch - it's all 3/4 for some reason. Somebody knows why but I don't. I happened to have some 1/4 inch flat molding that I could put together with 3/4 inch wood to make an actual inch. Pretty crappy looking but all they have to do is be there.

Here is what they are doing. The pillar boards are nailed to each other and to the spacers placed at the top and bottom of the post. There is a lot of fiddly work and adjusting to do, and nothing is really square or straight, but I am holding my own, so to speak.

Two pillars built, in need of some touchup and paint, but from a distance they look okay. They are certainly not much worse than what was there before. I am working at the limit of my skill and the ability of my tools and as long as you don't look too closely it's alright.

The bummer of the day was, just when I was about to start doing this, Donna told me there was water on the floor of the back room in the basement, near where she keeps some of her books for sale. I wisely had everything up off the floor on an old wooden futon frame for just such an event. It seems an ancient iron water pipe has sprung a slow pinhole leak, and it is very fortunately in a place that it will be relatively easy to replace it with copper. I keep hoping the 80+ year old parts of the plumbing will just wait until I am dead to fail because some of it will be a real pain to replace. So I got to start my work angry and frustrated at having been suddenly jolted out of my focus by another problem. It's been pretty rough the past few weeks with environmental issues - too hot, too sunny, too many people out doing things and raising a ruckus, and I have been generally anxious and depressed over that and my zillions of internal demons I never discuss with anyone. I really have no person or thing I can turn to for relief. Now I have to think of this new thing too.

Friday, July 22, 2011

PORCH PROJECT - cosmetic

It was rainy for a few days this week, which delayed my work since it involved a lot of painting. Over the past three working days I have completed most of the cosmetic restoration of the railing wall. I was able to salvage much of the original siding, and only had to buy one 16 foot piece, the top one across the inside of the wall as seen below. It was mostly just painting, sanding, cutting and nailing which is not as exciting as demolition and takes longer.
One of the many useful features the old porch lacked was the cutouts at the bottom. Since it was only open at one end, all the leaves and blossoms shed by the wisteria had to be swept the entire length of the porch. That's what those cutouts are for - if you look you will see them on a lot of porches, so you can sweep stuff out. Some of the details came out a bit weirdly where the end parts come together, but it achieves my basic need of not having anything jump out at you from ten feet away that makes you say what the hell is that.
This is the wood for the pillar restoration. The short ones below are salvaged from the original pillars and the longer ones are new wood I bought today. I hope I have made my last purchase of materials for this, but I may end up having to buy one or two little things I can't predict yet.

Addendum: I just did the math and not counting the trip to the dump and the gallon of paint I bought today this project comes out to almost exactly $700. That is way more than I had hoped, but about a tenth of what I would pay to have somebody else do it. I was hoping for more like $400, but it's something I won't have to do again so I am glad I did it as well as I could. I think the wood I salvaged saved me about $150 - $200.

Friday, July 15, 2011

PORCH PROJECT - my rival

Just to provide some perspective on this whole thing, when I am patching and painting thirty year old siding to re-use it, or coming home with two boards and a box of screws, these guys are dropping off huge truckloads of lumber and materials across the street.

The strange thing is that, while it will undoubtedly be the nicest house on the block, it bears an unsettling resemblance to the crappiest house on the block, two doors down. Both views taken from our upstairs front windows.

Thursday, July 14, 2011

PORCH PROJECT - siding, railing, and a stupid thing in a hole

The last couple of days have involved a lot of painting of wood in preparation for assembly into the finished porch railing. There was some drying time today which I spent cleaning up the garden and some small neglected areas. When we moved into the house there was a two foot high planter box occupying what is now the dirt strip in front of the porch, and when I tore it out there was one post that wouldn't come out so I cut it off around ground level. Today after a couple of decades I finally dug down deep enough to see what was going on. About two feet down I came to this concrete post hole filler. That is the sort of thing that is usually at ground level. There is no reason to dig three or four feet down, set your post in concrete, and then bury it under two feet of dirt. The only thing that makes any sense, and even that doesn't make any sense, is that they had this post they dug up from some other spot with the concrete on it, and then buried it that deep. Which is stupid. Nothing about this makes sense. I knew I wasn't going to get that out so I started whanging away at the post with U.S. GOVT, my loyal ball peen demolition hammer, until the concrete block cracked and I was able to pull the post out. The concrete is still down there, for the next guy to worry about.

This is what I got done over the last two days, replacing siding and putting the 9.5 inch wide upper railing on.

I had to do some cutting and re-assembling to get the railing around the support posts. I meant to give myself a little extra room but not this much! This will be covered when I reassemble the old pillars around the new posts.

These 2x2 sections are screwed to the post and railing structure, then the end and upper railing are screwed onto them The whole upper railing is secured to the low wall structure by screws from underneath every two feet.


Friday, July 8, 2011

PORCH PROJECT - rail framing and scrap to the dump

Yesterday I got the framing for the porch rail done. It was just a lot of cutting things to length and screwing them together, with only a few errors to complicate things. Here's what it looks like. The good thing was, I had to return some bolts and brackets I overbought at the beginning of the work and the lumber I bought for the framing and railing came out to be less than what I got back on the return so I ended up with a net gain for the day. I am becoming less satisfied with those steps as they seem a bit wobblier than I like. I don't think the 2x2 supports under the steps are stable enough.


Today I loaded up what was left of the old porch and hauled it to the dump. All the unpainted wood went to people who will use it in some way, so there was just this carload of painted wood.

Here is the entrance to the transfer station. It is about a ten minute drive down the freeway from here. The truck ahead of me is on the scale, checking in at the window to find out where to take it. They weigh your vehicle on the way in and again on the way out and charge by weight with, I believe, a $20 dollar minimum. The white structure in the background is the big shed where I was to go.
The last of the old porch is on that big heap of scrap wood. There were a number of different heaps around the shed, with the constant rumble, crunching and beeping of a big machine scraping it up and moving it around. It smells like an elementary school lunchroom plus dust. It always reminds me of my old lunch box.

I worked on the big 2x10 boards which will form the top of the railing after I got home, sanding them smoother, priming them for painting and cutting them to fit. I promptly screwed one of them up in the cutting, and realized I needed a longer board to work with anyway so that's both bad and good.

Wednesday, July 6, 2011

PORCH PROJECT - west steps

Yesterday I built the steps for the west end of the porch, something they don't seem to have had ever before. The west end, nearest to the driveway, was blocked by a railing, as shown in earlier PORCH PROJECT reports. It was possible to put things up on the railing and walk around to get them and take them into the house, but if it was a big box of heavy books, forget it. I am tall enough I could reach a bag of groceries over and set it on the porch floor but Donna couldn't. Here is where they needed to be. One thing Barron and I have discussed is where we will install our wheelchair ramps, and I have made that process much simpler by opening up this end of the porch.


Here is the plan. I screwed up the first diagonal I cut, as I thought might happen, but I had extra stock to work from for just that reason.

Nothing very exciting happened and I eventually ended up with this. After working in the blazing sun for too long you would think I'd have sense enough to quit but I also wanted to rebuild the front gate since I had everything set up for that sort of work and ended up making myself feel pretty lousy by the end of my labors. I am still recovering today. It didn't make it to 90 degrees but anything over 80 is pretty tough for me to take. The next stage is restoring the railing and cosmetic details.

Monday, June 27, 2011

PORCH PROJECT - phase one complete

Today I finished the major construction. All the most expensive and arduous work is done. Below you see how I used shims to space the boards. The shim is about 1/4 inch thick at the wide end. When I got past the halfway point on the deck I doublechecked my measurements to make sure things would fit roughly as they were supposed to, then I went to the west end and cut the end boards to fit around the pillar, as I did on the east end. I cut the remaining boards to length and put them roughly in place so I could fiddle with the placement to see that the spacing was fairly even. The spacing is a bit wider on the west half of the porch, but not so anyone would notice it. It falls within my 90% success rate requirement.


Most of the work was pretty repetitive; cutting boards to length, setting them in place, pre-drilling and driving the screws. I have foam knee-pads from when I re-built the downstairs bathroom and did the tile in the shower, and they were a good thing to have for this. The next goal is to design and build steps for the west end of the porch for direct access from the car. After that all the work will be cosmetic, re-using as much of the old wood as I can to make it resemble its original form, with certain needed improvements. I worked over four hours - more if you count going to buy the lumber, and I am tired. It was also quite a bit warmer than I like it to be for this kind of work. Donna doesn't know how hard it is for me to act nice and friendly when I am this tired, but I think I fooled her.

Wednesday, June 22, 2011

PORCH PROJECT - basic functionality restored

Today the first batch of surface boards went on. Here is another useful feature of the sawhorses. After I marked all these boards for cutting, I stowed them in the sawhorses so I was able to pull them out without having to go walk over and pick them up somewhere. That saw surprised me when I unplugged it and the round grounding prong from the plug just fell out. The other prongs are kind of bent up from being pulled this way and that over the years so I will see if I can find a replacement plug for it next time I go to Home Depot. That transparent face guard lying on the ground by the front sawhorse, a gift from my tool patron Barron, is what I wear when I saw. I always work with earplugs in whether I am using noisy machines or not.

The first board had to be cut to fit around the corner post. The first one I did was a little better than this but I realized I had cut it so the bad side of the board was up, with tiny writing dot-printed on it at a couple of spots and I knew if that was the first thing I saw every time I stepped on the porch I would not like it. If you peer closely you may see down in the crack that I put two long screws into the side of the end section in the hope that it would decrease the risk that it would split off some day.

I used plastic shims as spacers to keep the boards roughly the same distance apart, and marked the spots for the screws before pre-drilling so it is pretty consistent in appearance. I realized after the first board was on I probably should have gotten the special deck screws that are the same color as the boards instead of the grey outdoor kind, but what the hell. Nobody will notice but me. I am not 100% satisfied with that step, but I am going to go with it. I do like the fact that it is shorter than the width of the concrete step so you can step up on it from both the front and side. The far end of the step, by the door, has a piece of pressure treated 2x4 under it, because the porch has a two inch slope, good design work on the part of the original builder, meant to let the rain roll off away from the house. With gaps between the boards that is fairly moot now, but not much rain gets in there any way. Just don't drop your pocket change because I am the guy who will have to crawl in there and get it.
The front door is back in use again. I used up all the boards I had, and tomorrow I need to get caught up on some other work - bake bread, grind peanut butter, sharpen the push mower, make limeade, etc. I am pretty sore and tired just from toting, hammering, and generally working for hours and then riding my bike to the health club. I just flopped down in the sauna for a while, then bathed and shaved. That's what my life is like.

Tuesday, June 21, 2011

PORCH PROJECT - frame up

I borrowed this gigantic saw from Barron, and it really pays to have friends who can loan you good tools. I got rid of my crappy old circular saw because it isn't supposed to cause clouds of smoke to spew from the burned black ends of the wood you are trying to cut. I didn't know what the problem was so I stuck it out front a few weeks ago, with a warning label on it, and it went away. I set the sawhorses up inside the porch thinking it would be more convenient but that was kind of stupid. What wasn't stupid was screwing a couple of blocks onto the sawhorses to keep the boards from moving around - that worked really well.
I got the frame put together in spite of the fact that I dropped everything it was possible to drop as many times as it was possible to drop it. Because of the pillar at the center it was necessary to make two frames with a space between them. Anything that rests on concrete is held in place with screws, and anything not resting on concrete is secured with nailed brackets. Vertical load is the main concern - the frame has to distribute the weight, like a cat burglar wearing skis because the floor will set off the alarm if anything over ten pounds is placed on it. That's how you learn things about life - from heist movies. The side-to-side stringers are roughly two feet apart, and the surface boards will be going across them from front to back. It should distribute the load well enough that if I ever had any three hundred pound friends they could stand on one leg on any board and not go crashing through. All my six hundred pound friends would have to stay on the porch because I don't know how much the living room floor could take.
The toughest thing about this for me is buying things. I agonize over whether a three dollar piece of cheese is an extravagant luxury, so spending over a hundred dollars on a carload of lumber is really difficult. I have to keep reminding myself that this is something we will be using every day for as long as we are in this house, and doing it right the first time is cheaper than trying to fix it later. I try to get maximum value for what I spend so making this porch last as long as possible makes its per day cost a matter of pennies.

Friday, June 17, 2011

PORCH PROJECT - lag screws and the sudden return of doomaflotchie

Yesterday I pulled a 4'x3' piece of heavy plywood out of the basement and cut it into 9"x4' strips with the electric sabre saw. I pulled off the pieces of siding I had temporarily placed over the opening to the basement, and attached the plywood to the ends of the floor joists and the sill beam on which they rest. The sill beam is a rough old 6" beam resting on the top of the foundation. I marked the positions of the joists on the beam before I put the plywood on. Then I pried up the lower edge of the siding and pulled out the nails so I could slip pieces of tar paper up underneath to provide some degree of waterproofing, then stapled the tar paper to the plywood and marked the position of the floor joists in chalk, in case I needed to screw anything into them in the near future.
Today's job was to attach two 8 foot long pieces of pressure treated 2x6 to the sill beam. I rested the outside ends on the concrete foundation and, using a level for levelness, attached the other ends to the plywood under the tar paper using one screw for each 2x6. That was just to hold them in place. I marked positions every two feet to drill holes for the lag screws so they would enter the sill beam about an inch down from the top. This was all done blind, calculating the height of the joists to find the top of the beam. Well it makes sense to me, and it worked. Below you see the lag screw and the tools used to screw them in. Why they call them lag screws I don't know. I pre-drilled with a 1/8th inch bit, which I always do before using a large bit, so it keeps it from going crazy and wandering around. I drilled through the 2x6 with a bit almost as large as the diameter of the screw, then through the beam with a smaller foot long bit. The idea was for it to be fairly easy to get the screw through the 2x6 but be pretty tight in the sill beam. I was able to go inside and see where the bit came through to make sure my plan was working, and it did. I got the screws most of the way in with the ratchet, then used that fine old crescent wrench and a lot of body weight to tighten the last two inches.
Here it is. I really feel like I got my exercise today because getting those eight screws in was a lot of work and I had to rest a while after each one.
As I was cleaning up afterward, putting the tools in the bucket or something, feeling good and tired, my mind suddenly said to me, for no apparent reason and apropos to nothing I was thinking or doing, the word doomaflotchie. I had not thought or heard the word doomaflotchie in so long that I don't even know how long it was. As I recall it, doomaflotchie came from Grandma DeVries, as part of my Midwestern (Chicago) Euro-American heritage. Or maybe it didn't but that is how it seems to me. It is the equivalent of thingumabob or dealybobber, but it has an exotic elegance those rather silly terms lack. Doomaflotchie.

Wednesday, June 15, 2011

PORCH PROJECT - complete disassembly

Yesterday I took the rest of the porch to pieces. Most of the decking was secured only by a single nail up next to the house wall so it came off easily until I got to the section by the door, which was newer wood - not tongue-in-groove decking but plain pine - and nailed excessively. This was the rottenest wood, right by the front door, because it was the wrong kind of wood for the job. Look how the cinder blocks hang over the inside edge. Some of them were actually teetering on the uneven concrete. Also note how the end of the long stringer at the bottom right is sitting on a little block of wood. Most of the older boards were not nailed to that stringer at all. I suspect those parts were re-used from the original porch when it was stupidly rebuilt.
I found to my surprise that 16 foot long rough cut 2x4 you see going all the way across the front of the house at the bottom of the yellow siding was nailed to the ends of the joists for the floor of the house and when removed it gave access directly to the basement. The piece of wood crossing the space from left to right was the center support for the stringers that ran the width of the porch.
A shot of the other end of the intricate support system. I admit I knocked that block askew a little. The end of the crosspiece where it is set into the concrete at upper left was completely rotted away.
I'm sorry to report that this was the most interesting thing I found in there - a section of the framing from when they poured the porch foundation. That upright piece was stuck about three inches into a flow of concrete that must have leaked out. I chipped around it for a while with a cold chisel and when I got tired of whacking my hand with my U.S. GOVT. issue 5 pound ball peen demolition hammer, I just started whacking it away from the side of the foundation until it finally came out. You can see right down into the basement through that opening on the right. That is the end of a floor joist that runs all the way across the underside of the living room, on the far right of the picture.
Cleared away and cleaned up, with the opening to the basement covered up by some of the siding from the porch rail.
This is what a former porch looks like. Those 16' stringers are a little naily on top but still mostly in good shape. At the very least they would burn like crazy, having aged for 80 years or so. I started some time in the afternoon and worked about three hours. I know when I start hurting myself and knocking things over it is time to do something safe like sorting and stacking the wood. Plenty of free cinder blocks - you haul.

Monday, June 13, 2011

PORCH PROJECT - second and third pillars replaced

Today's work was easier since I had a better idea of what I was doing and what to expect. Here are my basic tools for this entire project. A corded drill for pre-drilling and driving screws, and a very inexpensive rechargeable one for light work. A full-length Stanley hand saw from a thrift store which I sharpened myself - power saws may be faster and more accurate but those are not necessities to me. Using and maintaining a hand saw makes me stronger and healthier. That crazy orange plastic speed square came from the dollar store, and though it isn't perfectly square it is great for the type of rough work this job requires. I mark my cuts with a fat tipped sharpie so I maintain a certain amount of leeway. I operate on the principle that this house was built with hand tools and I can do at least as well by working in the same way. I also used an electric sabre saw to cut away the floor boards where necessary. I don't have a good keyhole saw or I would have done that manually too.
Replacing the central support was a piece of cake. I propped up the end pillar to make sure it wouldn't go anywhere and cut the railing just to the right of where the jack and prop went in, and the majority of the railing and the central pillar came right out. When it came time to clear away the corner for the third pillar I found it necessary to tear the step away so I could cut out the end of an ancient piece of wood which you can see right next to the cinder block at the end of the porch. That was the only difficult part of the day's work.
Here it all is, cleaned up. The pillars went in so easily I couldn't believe it and the roof structure is probably more stable now than it has been for ages. I started around 10:30 and ended at 2 p.m. The porch is officially closed to anyone but me and I installed a new keyed door knob on the side door which you get to by going past the tall green shrub to the right of the porch. The next step is disassembling the porch floor.
The brick standing at the base of the right hand pillar is the one on which the full weight of that corner of the porch rested for decades. It will be put in a place of honor.

Saturday, June 11, 2011

PORCH PROJECT - first pillar replaced

Today I replaced the corner pillar on the west end of the porch. I used a prop consisting of two 2x4s screwed together with 3" nails every foot, with a block screwed to the bottom and a longer piece screwed to the top to spread the load on the box beam when lifting. The old pillar is lying on the ground, and it wasn't nailed to anything, just gravity keeping it in place. When I jacked the roof up an inch or so the pillar stuck for a minute and then just dropped down onto the railing with a clunk. This supports my belief that if there were a drunken brawl on this porch any one of the pillars could be knocked away by a crashing body.

This is the screw jack, one of two I borrowed from Barron. I use a big screwdriver in the holes to turn it. Just behind it is one of the 16 foot stringers running the width of the porch on which the floorboards ostensibly rest. That end of it can be moved back and forth freely a foot or so, indicating that the floorboards aren't even nailed to it. They do seem to be nailed to the other one, seen in the upper left corner of the picture. This end of the nearer one isn't really resting on the wooden block beneath it either.

I cut a square piece of the 9x2 railing from the end of the porch to use as a header block for the box beam to rest on. It may have been added in the idiotic rebuild which I am trying to rectify, and inside it was white and fresh, and smelled great. The wood of the old pillar seems to be more 1930s era, very dry and easily split with a blow of the mallet. You can see the top of the prop to the right.

Below is the spot on which the supporting member rested. They put the floor down, then built the railing on top of it, then set the pillars on the railing. The weight of the roof on one 2x4 resting on the flooring for decades compressed the board to about a third of its original thickness, and to a consistency of dry crumbly cardboard. I swept it away with a broom.

Here is the treated 4x4 in place, the ends wrapped in tar paper as a bit of excessive precaution against decay. When they tear this down I hope it will still be in pretty good shape. I laid the old pillar across the end of the porch to keep the unwary from stepping off into a hole. I started around 10:30 a.m. and ended about 1:30, but it seemed like a lot longer. Shower, lunch, and goofing off for the rest of the day. I have the rest of a Wheeler and Woolsey movie to watch.

Friday, June 10, 2011

PORCH PROJECT - primary disassembly

Today I took all the siding off the lower section of the porch. Here is a glamor shot for you Wisteria fans.


This is not the support for the central pillar, because there is nothing underneath it. What's holding it up? Not the vertical member to the right, because that wiggles freely. Apparently the load is distributed by the railing to other parts of the porch. This has made it necessary for me to re-think where I can cut the rail to put in my temporary supports, so as not to bring the roof crashing down. I think there is a lot of cantilever action going on in that roof thanks to adequate construction done in the 1930s.

Below you see the quality of workmanship involved. Each newer vertical member is accompanied by a couple of older chunks of wood - I said accompanied rather than supported by, because those chunks of old wood pivot freely on the nails attaching them. They do not appear to serve any purpose. The curve of the rail at the top of the picture is not lens distortion, it is the result of the load pressing down on either side.

This is a closeup of the west (left) corner. The direct support for this corner of the roof is the spongy, fragmenting older piece of wood with the big rusty nail in it, resting on the very corner of the cinder block. The other piece is just there to nail the siding onto.

Here it is with all the siding removed, and a sign for legal purposes reading, IF YOU COME IN HERE BE CAREFUL. The roof is no more likely to collapse today than it was yesterday, but seeing just how bad the situation is makes me worry more. All it has to do is stay up a few more days until I can get some support in there.